Making a backup of your data is as important a practice as, unfortunately, still too little widespread. Having a copy of your data, whether it be documents, photos, videos or other, is essential to sleep peacefully without the fear that a PC hardware problem or ransomware compromise them, without the possibility of recovering them.
There are many ways to make a backup: in the cloud, on an external disk, on another disk inside your PC, or on a NAS. Today we will focus on the latter solution, much loved by more experienced users, who have long backed up their data to keep it safe and avoid taking risks. Performing a backup on NAS might seem like the most “complicated” solution, but we assure you that it is not at all the case: the procedure is actually very simple, especially if you adopt solutions designed specifically for this purpose, which make the whole process quick to start. configure and fully automatic.
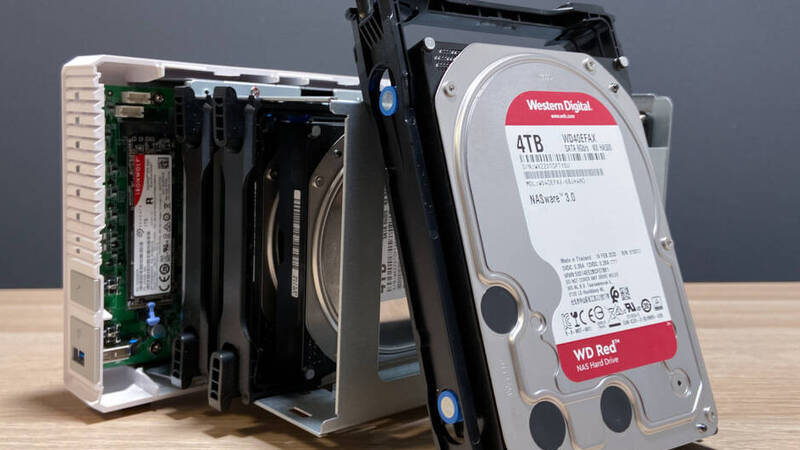
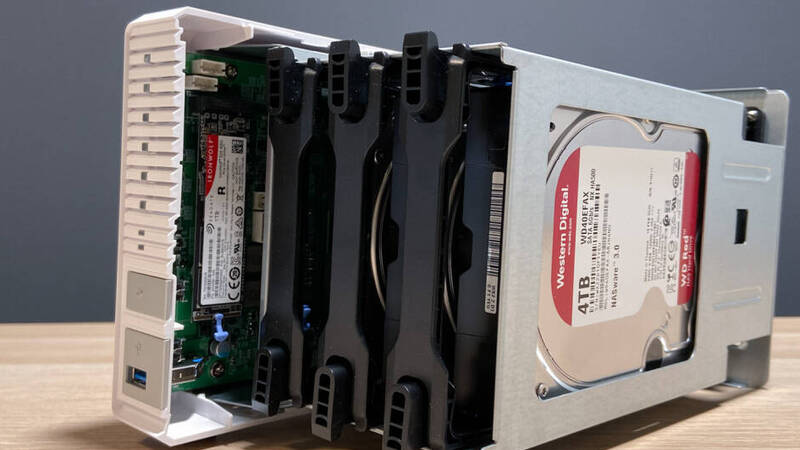
With this in mind, in this article we want to talk about how to backup to NAS easily on both Windows and macOS. For the occasion we used a Qnap TS-364 NAS, a solution that allows you to install up to three Hard Disks and two NVMe SSDs, as well as supporting extremely useful functions such as one-click backup to an external device, data encryption and Hybrid Backup Sync, software developed to backup the data on the NAS in just 3 steps to another NAS, or to one of the many compatible cloud services. Inside the NAS we have inserted three 4TB WD Red Hard Disks each and a 1TB Seagate Ironwolf NVMe SSD.

Preliminary operations
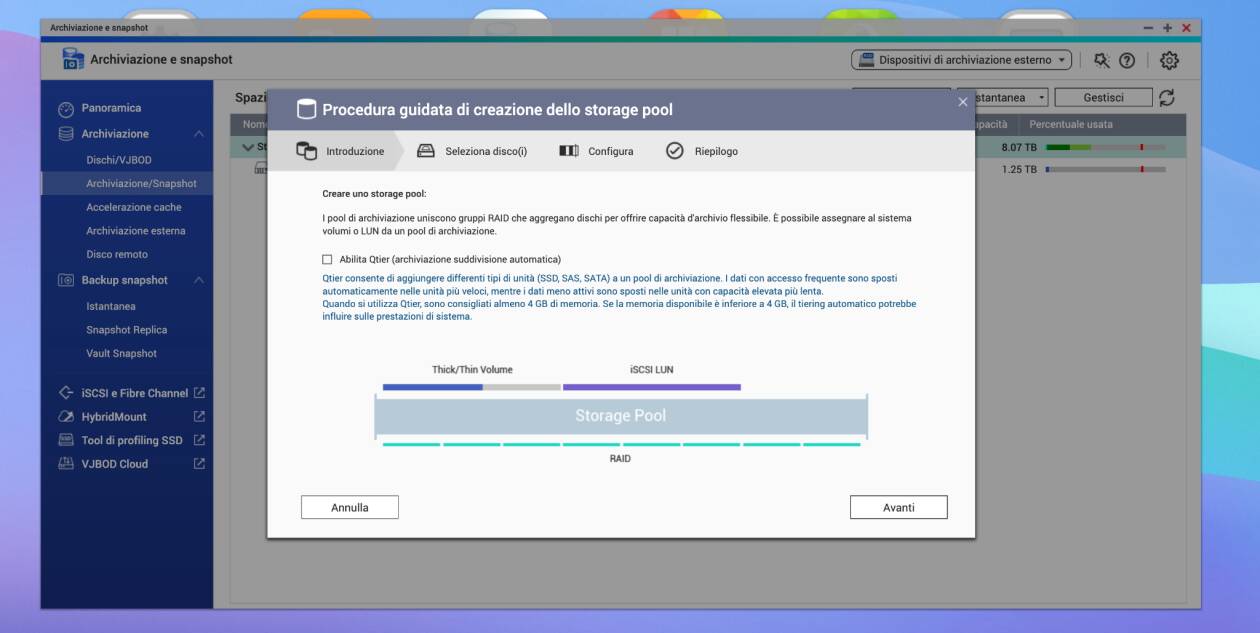
Now let’s see what are the steps to follow to make a backup to NAS easily and without having to bang your head too much. First of all, it is necessary create a new storage pool. To do this, from the Qnap TS-364 NAS interface open the “Storage and snapshot” application, select “Storage / Snapshot” in the left menu, click on “Create” at the top right and from the drop-down menu that opens, select “New storage pool”, as shown in the image below.
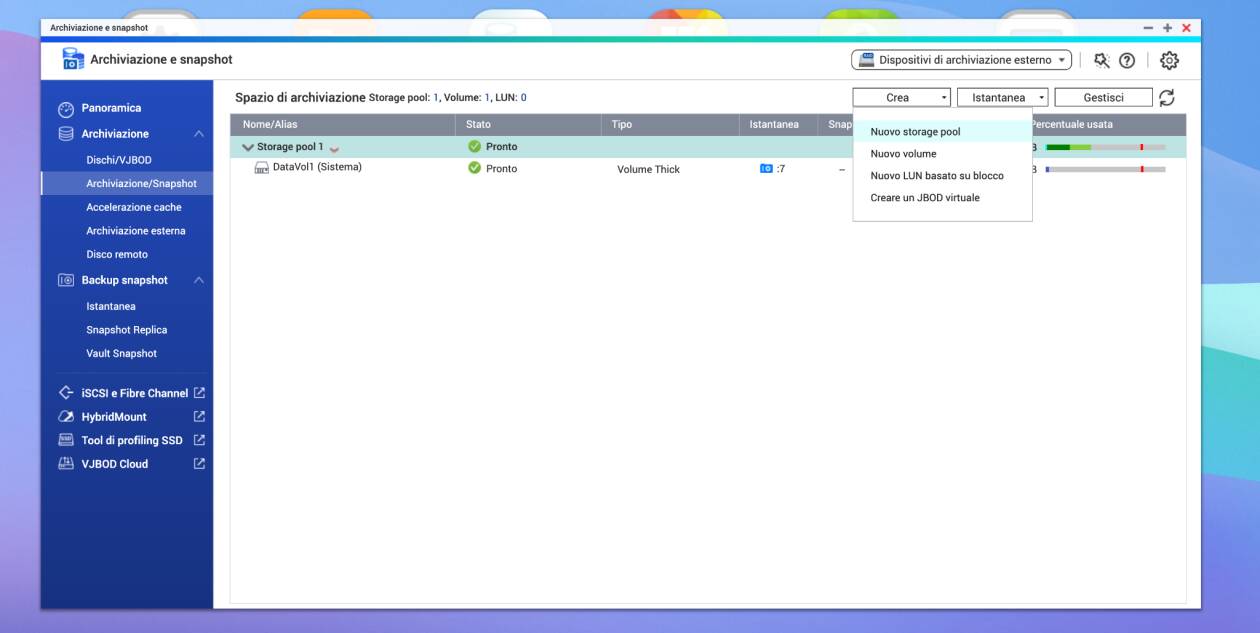
Once this is done, the wizard will open, where you can decide whether or not to enable Qtier (which allows you to add different types of storage units to the pool), select the disks and configure them.
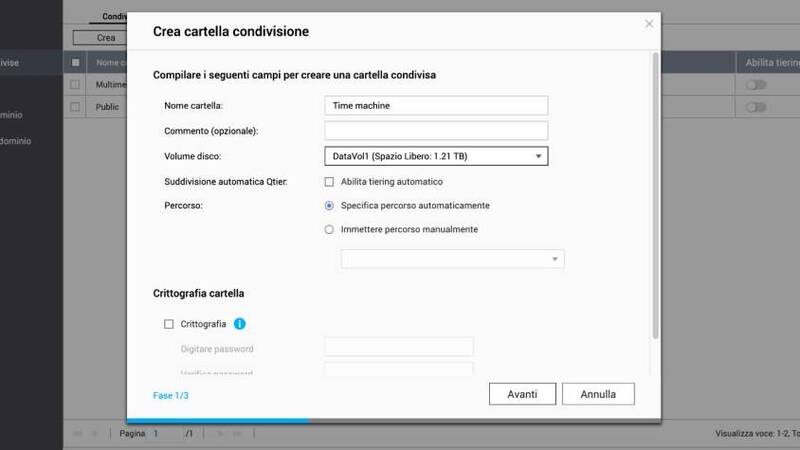
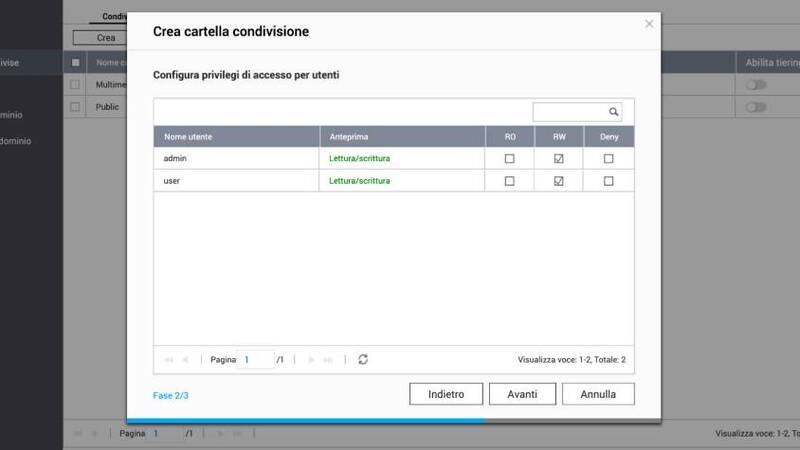
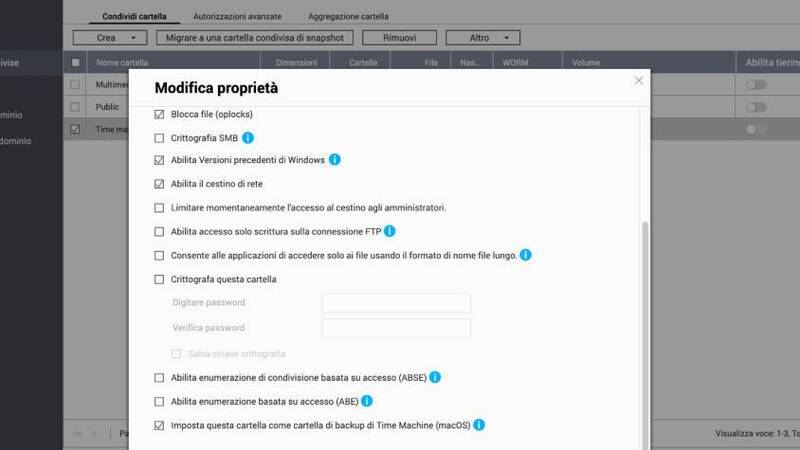
Once this is complete, you will have created your storage pool. Now open the control panel and select “Shared folders“, Then click on“ Create ”to create a new folder and give read and write permissions to the user you will use to login from your Mac / Windows PC. If you have a Mac and you will be using Time Machine, remember to check the item “Set this folder as Time Machine backup folder” in the shared folder properties.
How to backup to NAS easily with macOS
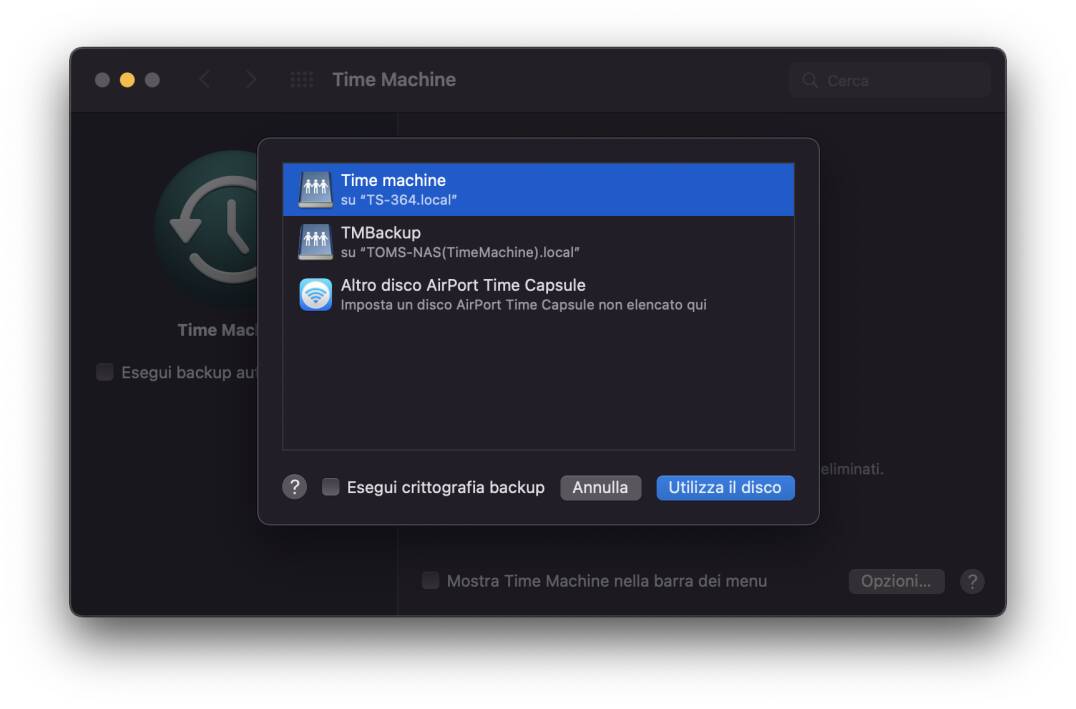
At this point, it’s time to interact with your Mac to set up the backup on the NAS. Go to “System Preferences” and select Time Machine, then click on “select disk”. If you have followed the procedure correctly you will see the shared folder you have created appear in the list, select it and press on “use the disk”.
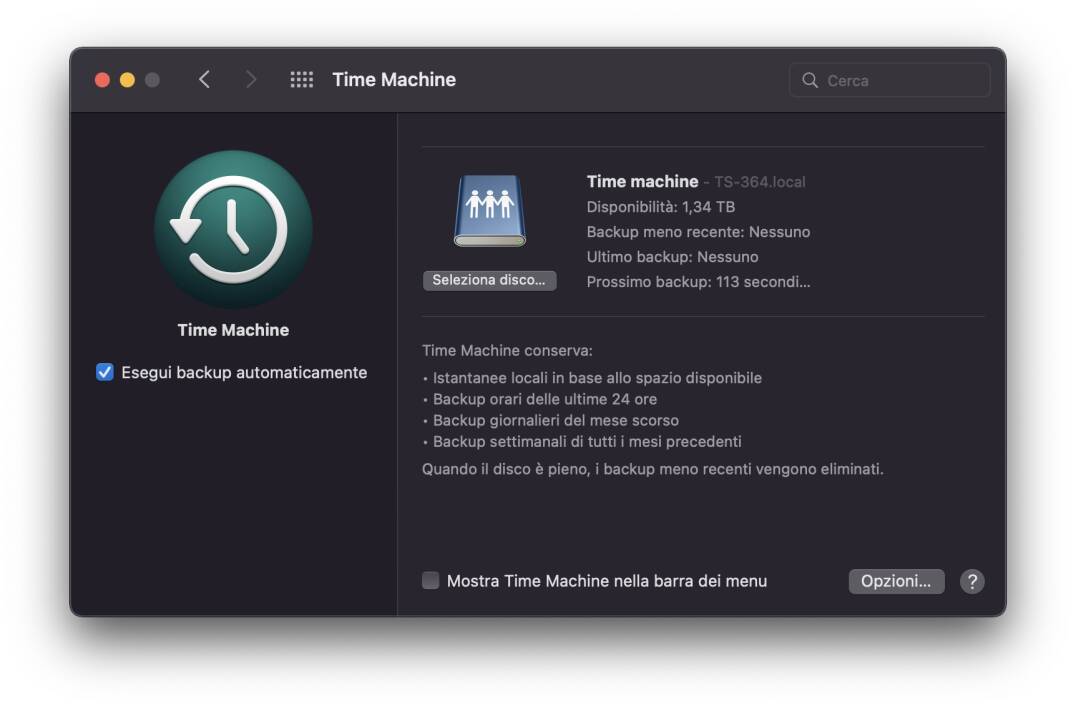
At this point, you don’t have to do anything else. The Time Machine screen shows when the last backup was made, when the next one will take place, and how much space is available on the NAS. From the options you can choose which folders to exclude, while from the Time Machine screen you can disable automatic backup, if necessary.
How to backup to NAS easily with Windows
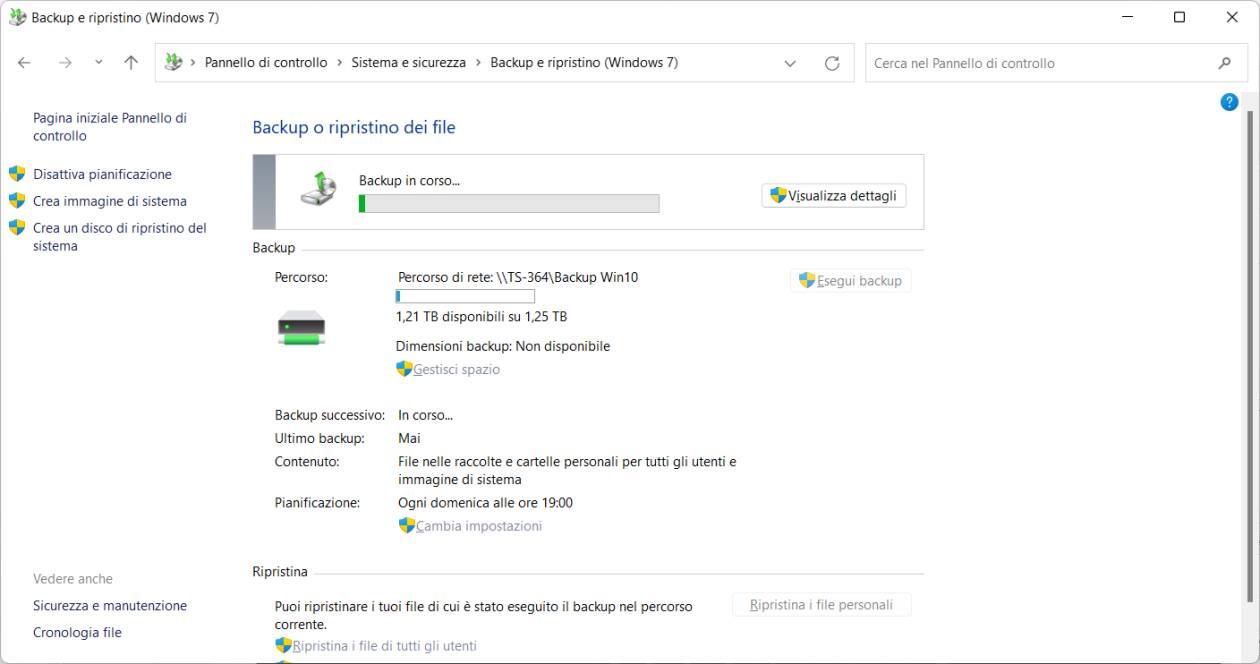
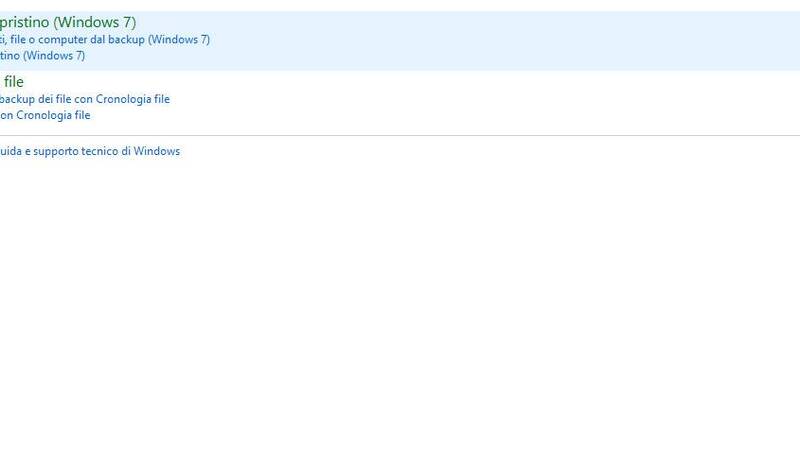
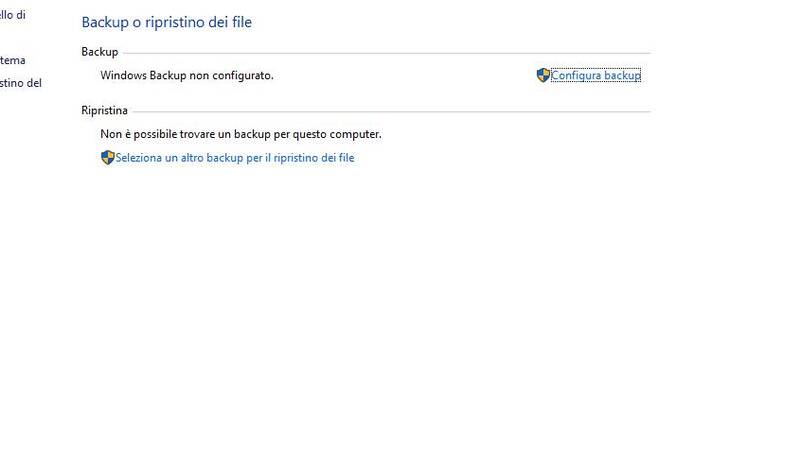
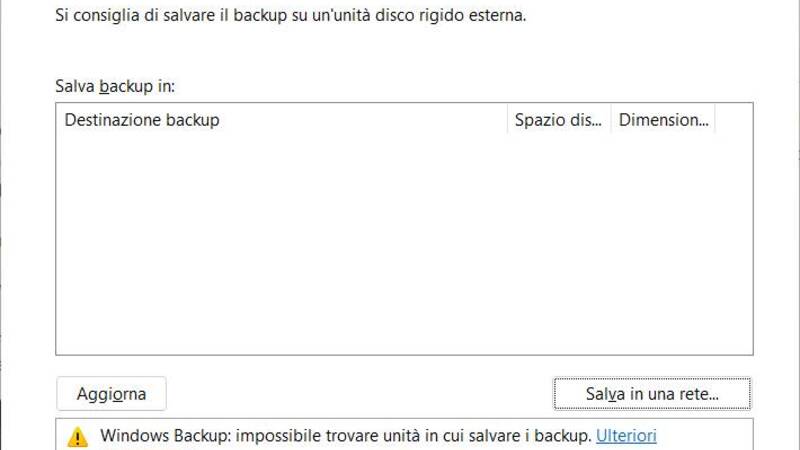
Even on Windows, the operation is very simple to perform. Go to the control panel and select “Backup and restore“, Then“ Configure backup ”and then“ Save to a network… ”.
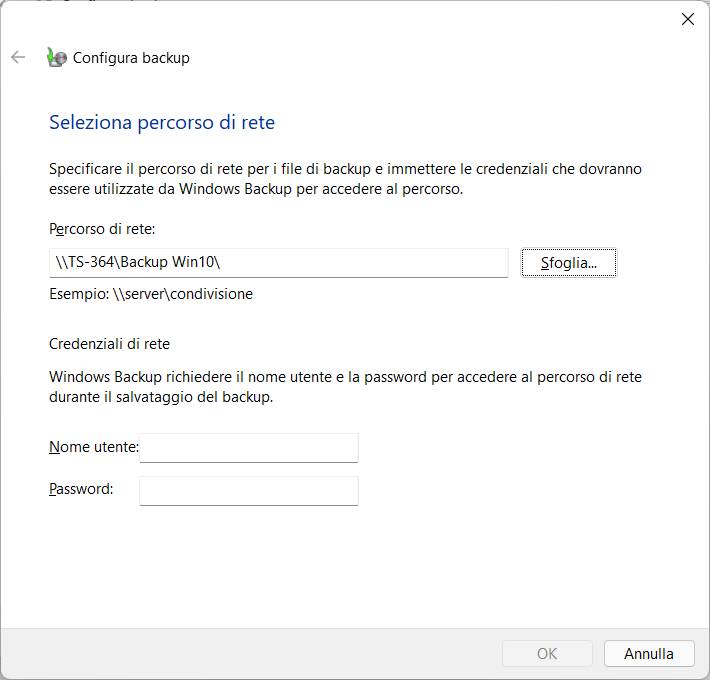
Now select “Browse” under “Network Path”, identify the NAS and the shared folder you created earlier in which to place the backup. In the Username and Password fields under “Network credentials” enter the login data to access the NAS, then click ok.
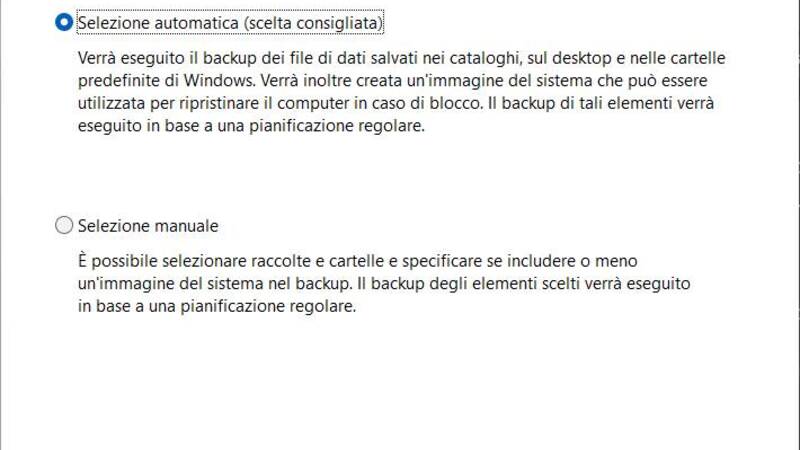
The next screen shows the location where the backup will take place; if everything is in order, click on “Next” to select which items to backup. Checking “Automatic selection”, the recommended choice, will also create a system image that can be used for recovery in case of need.
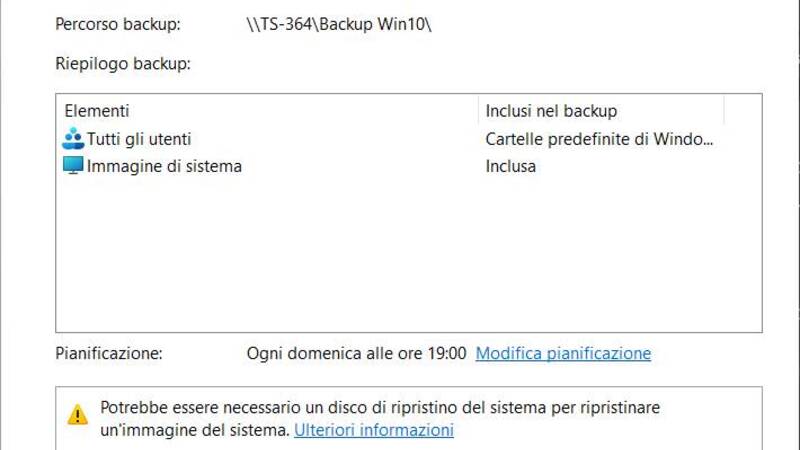
Pressing “Next” again will take you to a final summary screen; if everything is configured correctly click “Save settings and backup”. At this point the procedure is completed and you will be returned to the “Backup and restore” page of the control panel, from which you can see the progress of the backup, the date of the last backup, the content and space available on the NAS. From here you can also change settings or backup by pressing the respective buttons.